Developer Documentation
Here you will find all you need to know about developing and managing your site on libops.
Initial setup
sitectl
If you haven't already, install sitectl on your local machine.
sitectl has many useful commands to interact with your site. You can learn more about them by visiting the sitectl docs or by running this command in your terminal:
sitectl --help
Quick start
Your site's public URL, libops CLI commands ran against your site, and uploading code to an environment using SFTP, are all managed by libops.yml
A quick way to configure your working machine to properly authenticate to your libops site is by running this command:
cd /path/to/libops/sites
sitectl set developer
git add libops.yml
git commit -m "Adding myself to libops.yml"
git push origin development
After the GitHub Actions finish running for that git push in your GitHub repository, you could get a login link to your development environment by running
sitectl drush uli
More info on libops set developer
sitectl set developer does three things:
- Adds the Google Cloud account you're authenticated as with the
gcloudcommand to your libops.ymldevelopermapping. This is what authenticates you when running libops CLI commands against your site - Adds your current public IP address to the HTTPS and SSH firewalls. The default value can be overriden with the
--ipflag - Adds your public SSH key to libops.yml so you can SFTP to your environment
Authentication Overview
Google Cloud authentication
The libops CLI makes calls to the gcloud CLI for requests to libops services that require JWT authentication. In order to properly authenticate, you must configure your libops site to allow requests from your Google Cloud account. This configuration is done by adding your Google Cloud email address to the libops.yml developers mapping.
You can add your currently authenticated gcloud email by simply running the command
sitectl set developer
Or if you're adding someone else, you can add them with
sitectl set developer --google-account someone-else@instituion.edu
Firewall Settings
Until your site goes live, all your libops environments are behind a firewall so only you and your team can access the sites.
Ensure the public IPv4 address of the machine(s) you're working from is in the ssh-firewall and https-firewall lists in libops.yml. If the IP address you're visiting the site is not configured in libops.yml, you will not be able to access your site.
If you do not know your public IP you can run this command in your terminal to automatically detect your public IP address and configure your libops.yml:
sitectl set developer
Or if you know your IP address, you can pass it in with the --ip flag:
sitectl set developer --ip 1.2.3.4/32
SFTP Connection
Ensure your gcloud email and public SSH key(s) (i.e. ~/.ssh/id_rsa.pub) are added to developers in libops.yml
Your public SSH keys is required to be configured in libops.yml in order to SFTP to your environment and/or run interactive drush commands.
sitectl set developer --pub-key ~/.ssh/id_rsa.pub
GitHub Access
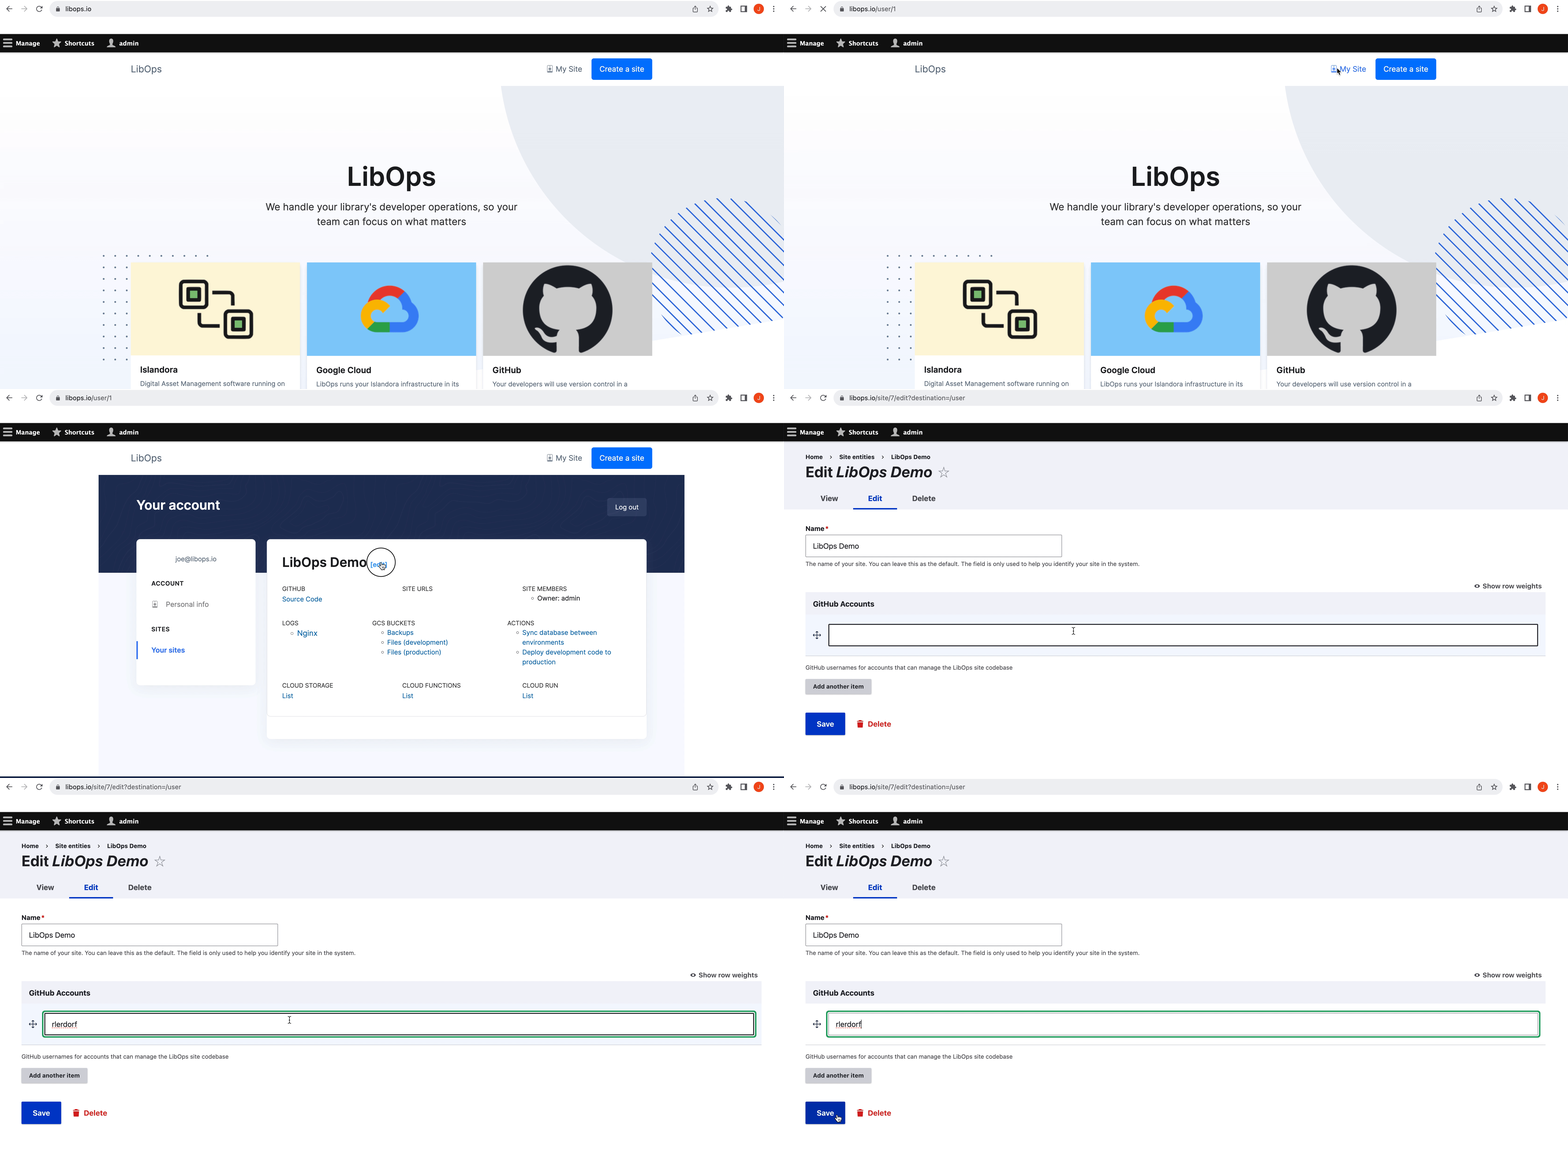
Currently GitHub access to your GitHub repository can only be managed from the libops website.
From there, you can add yourself and other GitHub users to your site by editing your site and adding their GitHub usernames.

Environments
By default, your libops site has a development and production environment.
You can make code changes in development, then deploy them to production once they're ready by creating a GitHub release.
If you have several features you're developing at any given time, you may want to have separate branches off of development to do so. Each branch you create off of the development branch automatically creates its own new environment.
GitHub branches equate to individual environments on libops. The exception to this is your production environment. Production code is pushed using GitHub releases/tags.
Cold starts
For libops sites that are not on a paid plan, both the development and production environments will power off after a period of no activity. This can cause the initial page load to take anywhere up to 60 seconds to load while the environment comes online. After coming online, your site will be responsive as you'd expect.
Paid plans will never have cold starts for the production environment.
Branch Naming Rules
Branch names must follow the docker tag naming convention. i.e.
The tag must be valid ASCII and can contain lowercase and uppercase letters, digits, underscores, periods, and hyphens. It cannot start with a period or hyphen and must be no longer than 128 characters.
URLs
Your GitHub repository will have the URLs for your development and production environments in the README.
When you create a new environment, this will create another URL to access the given environment. Once you create a branch in GitHub, you can get the URL to your environment by running
sitectl -e BRANCH_NAME get info | jq -r .drupal.url
Opening a PR will automatically add a comment to the PR with the URL to the environment, too.
Lifecycle
Once you're done developing a feature on a given branch, you can merge the branch into the main development branch. Then you can follow the normal deployment process.
Deleting the branch will delete the environment, including all files and the database in that environment.
Making code changes
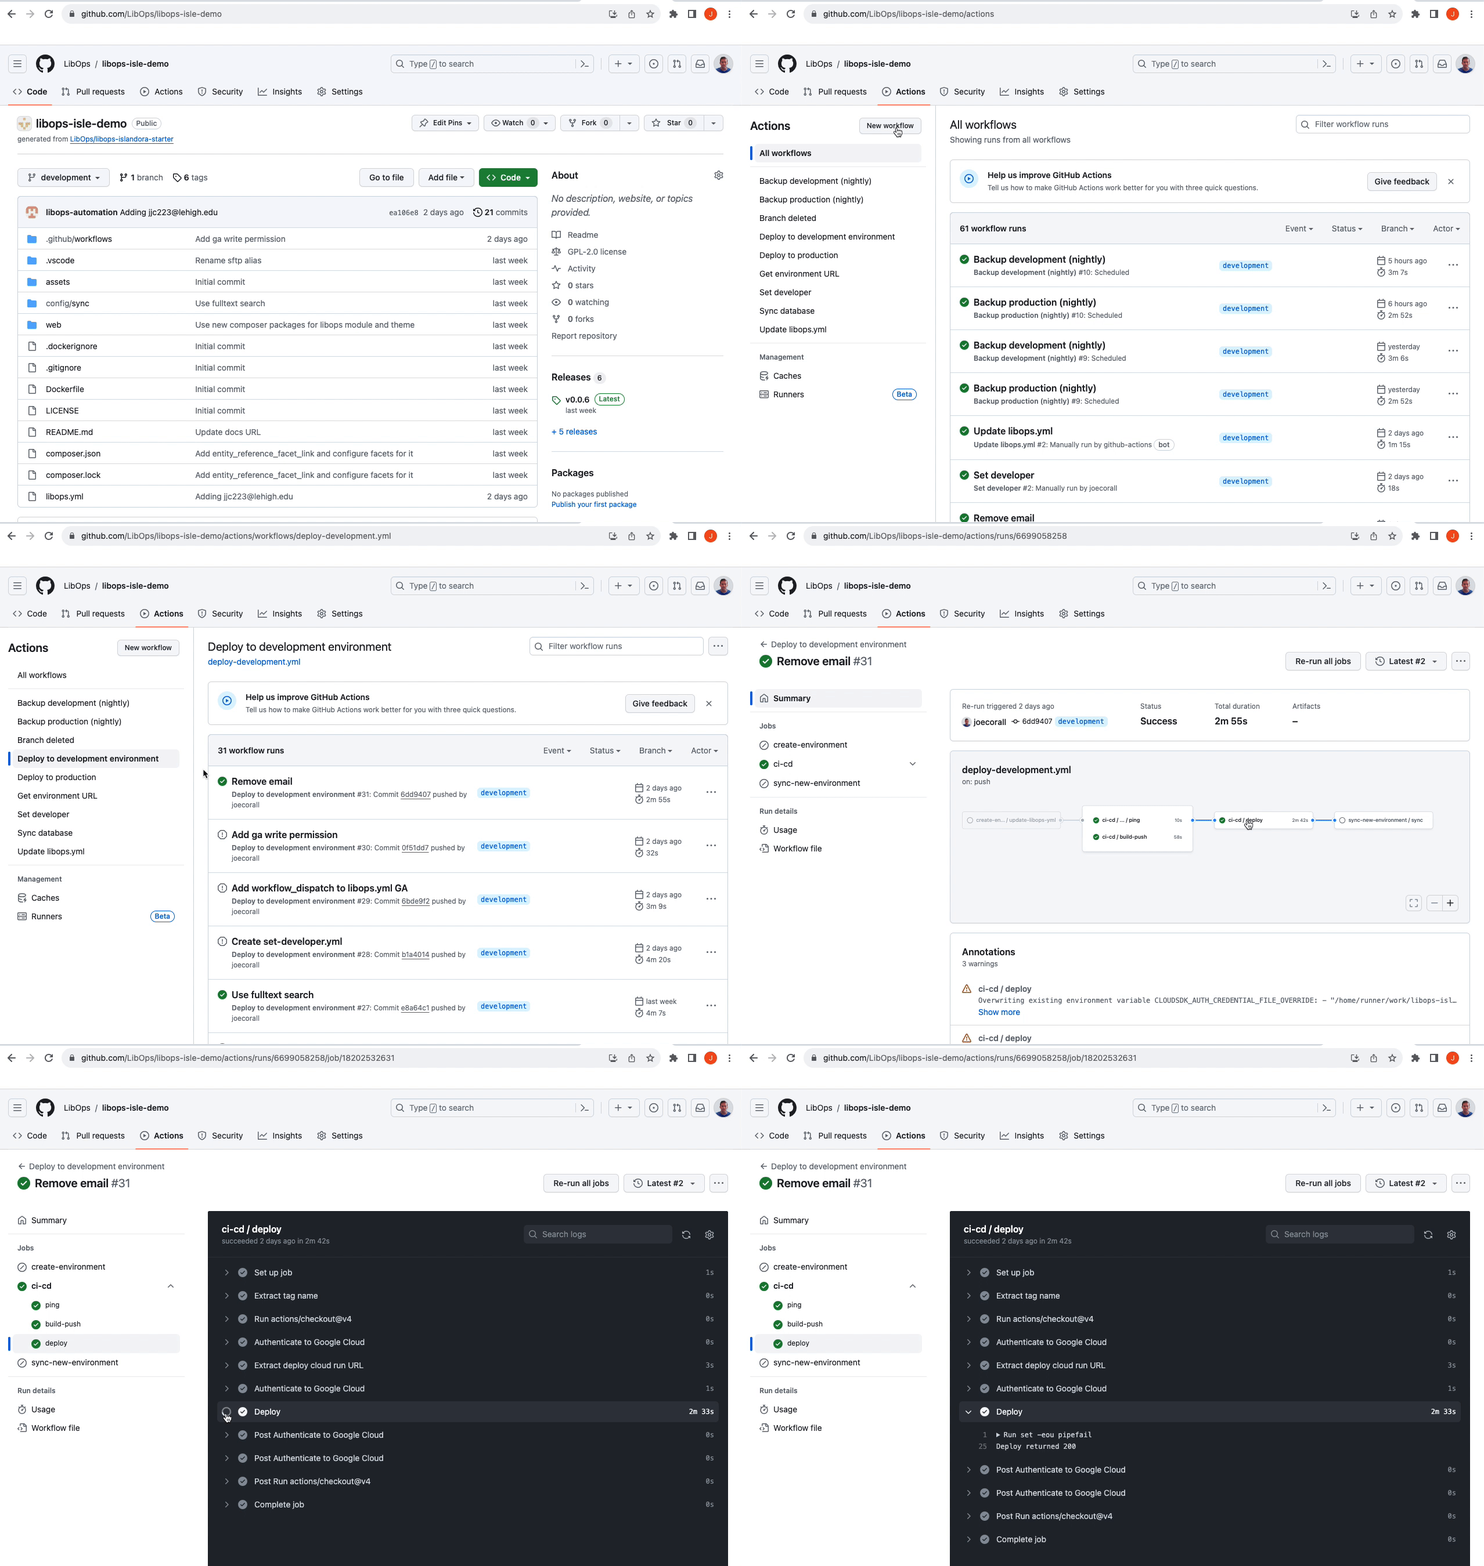
Any commit pushed to GitHub will automatically deploy to the respective environment. Typically from the time the commit was received by GitHub until it's deployed and running in the environment takes around 2-3 minutes. You'll know the code has been fully deployed once the "deploy" GitHub Action in your repository is all green.

While only using git to make code changes is certainly supported, often it's quicker and easier to use SFTP to iterate on a new feature in a libops environment. To do so, you will want to configure your IDE.
Configure your IDE for SFTP
To help you quickly iterate on new features for your site, you can use an SFTP plugin in your IDE to automatically upload code changes from your local machine to any non-production libops environment.
First, you'll need to configure you local machine to connect to your environment. The libops CLI has an easy utility to configure your ~/.ssh/config for libops. To do so, you can run the command
cd path/to/your/libops/site
sitectl config-ssh -e development
This will populate your ~/.ssh/config so any SSH client can establish a connection to your libops development environment at the hostname development.YOUR-LIBOPS-ID.site.
An example SFTP config for VSCode for your development environment is already configured in your site's GitHub repository. If you're using VSCode, and followed the instructions above, you should now be able to make edits on your libops development environment. Other SFTP Plugins can be configured similarly. The values needed to connect are
user: coder
host: development.YOUR-LIBOPS-ID.site
port: 2222
path: /code
Commit changes
After you're done making edits over SFTP, from your local machine you can git commit && git push your changes to the development branch, or create a new branch/PR then merge.
Deployment
To deploy your development branch to production, you can publish a new release in your GitHub repository.
After the new release is published a GitHub Action will deploy your code into production.